[toc title=”Table of Contents” type=”left”] [toc_item title=”1. What is Mailchimp?” page=”1″] [toc_item title=”2. How to Use Mainchimp?” page=”2″] [toc_item title=”3. What is a List?” page=”3″] [toc_item title=”4. How to Create a List?” page=”4″] [toc_item title=”5. How to Create a Campaign?” page=”5″] [toc_item title=”6. The Final Step” page=”6″] [toc_item title=”7. What Next?” page=”7″] [/toc]
The Final Step
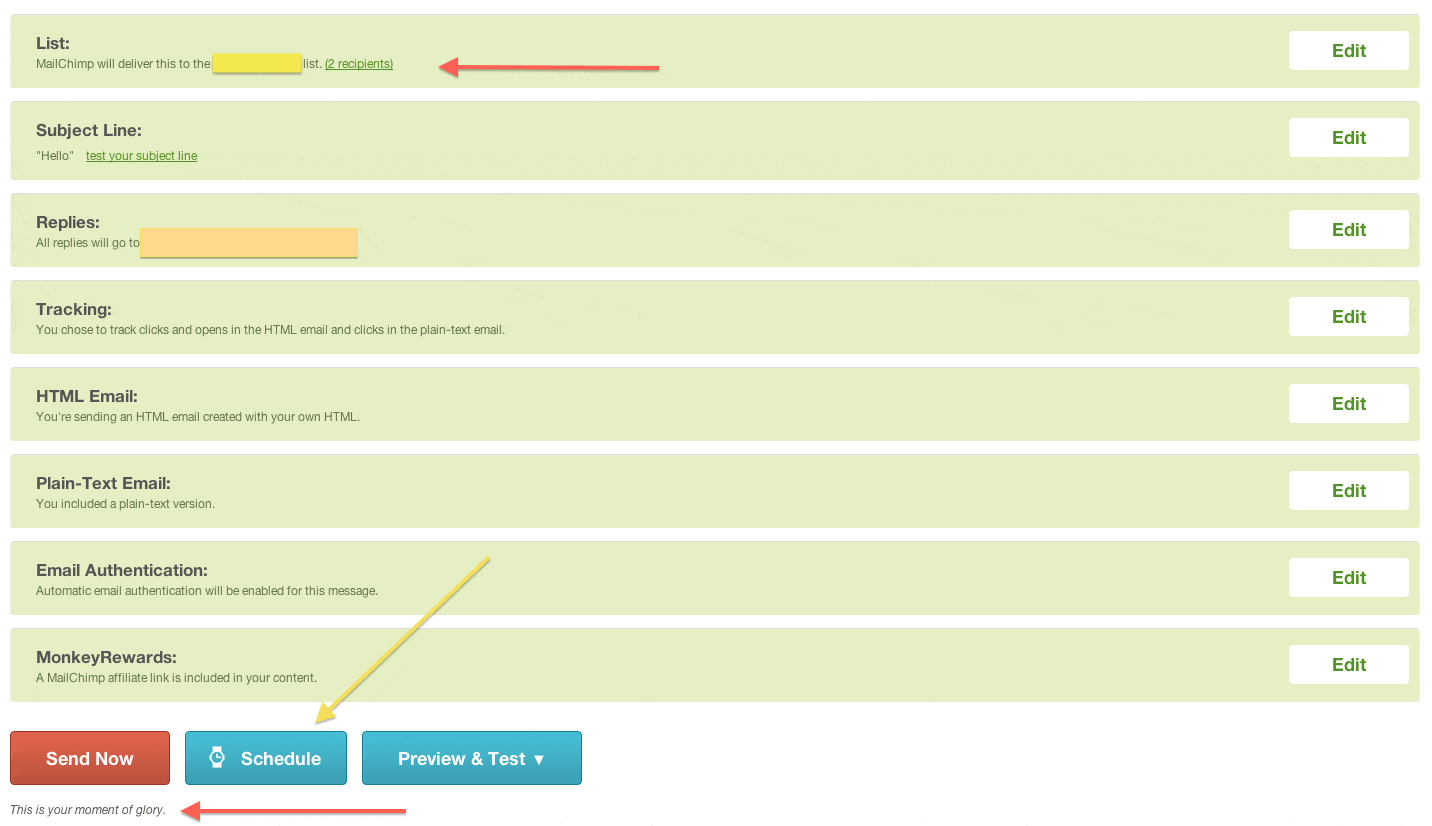
This is the screen you will see when you come to the final process of sending your campaign. Notice that your number of recipients is indicated above in the “List” column. Make sure you are sending this to the right “List.” Also notice that there are few options at the bottom of this screen. You can either send it right away, or you can schedule a time and date to send your campaign. This is always helpful for those who write numerous emails or create multiple campaigns and send them to the recipients at different times. Finally, it is “your moment of glory” as Mailchimp says! Make sure you click “Preview & Test” one more time, and click “SEND!”
What Next?
This is the easy step! Sit back, relax, and look at your reports by clicking on the “Reports” button on the top menu bar.
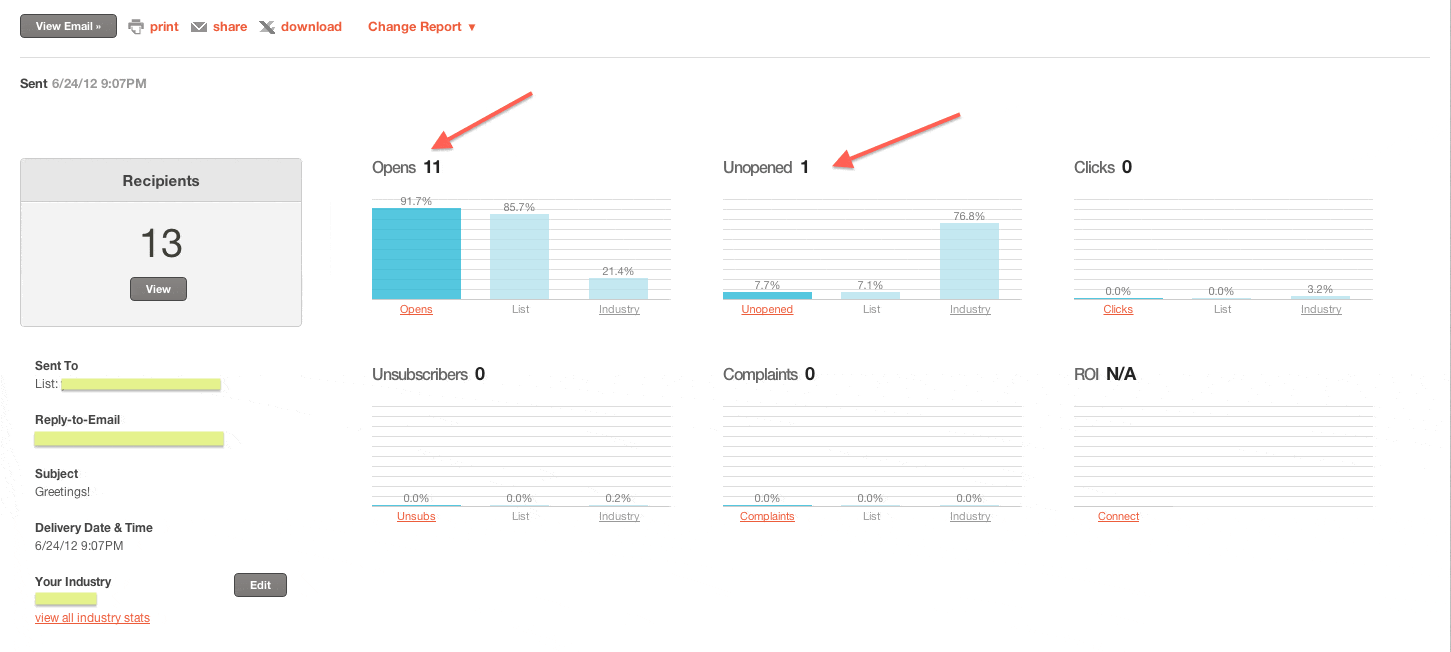
Then you will see the reports of who received your email campaign, who opened them and how many times your email is viewed… etc.
From here, if you scroll to the bottom, you will see an exciting thing! You will be able to see what countries or regions of the world your campaign is being sent to!
All this is done for free by Mailchimp. But, you can also purchase upgrades for more options to send your campaigns.


